Getting started with WebAssembly and Go by building an Image to ASCII converter
August 13, 202010 minutes read
TL;DR This blog illustrates how you can import your existing go code to Wasm, and run it in the browser. In this blog, I will show you how I made a tool to convert Image to Ascii characters on the browser that was written in Go. Link to the Github repo: wasm-go-image-to-ascii. Here is the Demo: Image to Ascii
What is WebAssembly?
Before moving on to writing the code, let’s first understand what WebAssembly is. WebAssembly or WASM is an assembly-like language that can run in near-native performance in the browser. It is not to be written manually but to be treated as a compilation target for languages such as C/C++, Golang, Rust, .Net, etc. This means first we write a program in a language, then convert it to WASM and then run it in the browser. This will allow the program to run in near-native speed and give the ability to run a program written in any language to run on the browser. You can create web applications in the language you are familiar with. It doesn’t mean it will remove javascript but exist hand in hand with JavaScript. The list of languages that support WASM compilation is in awesome-wasm-langs and more info on WebAssembly Webpage and WebAssembly Concepts.
Running go on the browser
Now, let’s get our hands dirty with some basic WASM and Golang.
Writing Go Code
Let’s write our first hello world program.
package main

import "fmt"

func main() {
    fmt.Println("Hi from the browser console!!")
}
Compiling to WebAssembly
Let’s compile it to Wasm.
GOOS=js GOARCH=wasm go build -o main.wasm main.goThis will create a main.wasm WebAssembly file that we can import and run on the browser.
Integrating with javascript
After we write our Go code and compile it to WASM we can then start integrating it on the browser.
We will need a Go runtime wrapper written in javascript to interact with Go through wasm. The code is shipped with Go 1.11+ and can be copied using the following command:
cp "$(go env GOROOT)/misc/wasm/wasm_exec.js" .Now, let’s integrate it into the browser.
<html>
  <head>
    <meta charset="utf-8" />
    <script src="wasm_exec.js"></script>
    <script>
      const go = new Go()
      WebAssembly.instantiateStreaming(
        fetch('main.wasm'),
        go.importObject
      ).then(result => {
        go.run(result.instance)
      })
    </script>
  </head>
  <body></body>
</html>
WebAssembly.instantiateStreaming compiles and instantiates WebAssembly code. After the code is instantiated, we will run the Go program with go.run(result.instance). For more information visit the WebAssembly.instantiateStreaming docs and Go WebAssembly.
Now if we run a server to serve the content we can view the output in the browser console.
The mime type for
.wasmfile should beapplication/wasmwhen served from the server.
We can use goexec to serve the files:
# Install go exec
go get -u github.com/shurcooL/goexec

# Start the server at 8080 port
goexec 'http.ListenAndServe(`:8080`, http.FileServer(http.Dir(`.`)))'
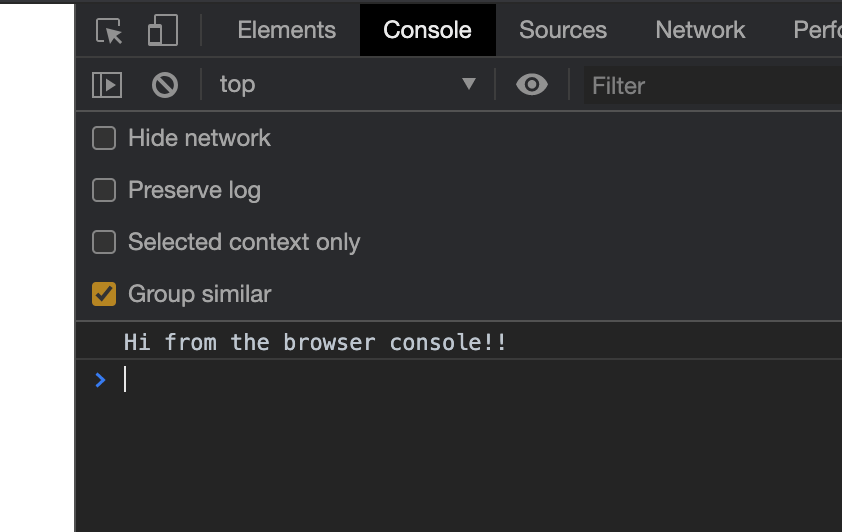
If we open Go WebAssembly Examplelocalhost:8080 on the browser and open the console we will see our message sent from Go:

Accessing Web APIs and exposing Go functions
Now that we know how to compile and run Go code to Wasm and run it on the web, let’s get started with building an Image to Ascii converter in the browser by accessing Web APIs. WebAssembly can interact with different Web APIs like DOM, CSSOM, WebGL, IndexedDB, Web Audio API etc. In this tutorial, we will use the DOM APIs in Go code with the help of syscall/js package provided in Golang.
package main

import (
  "syscall/js"
)

func main() {
  c := make(chan bool)
  //1. Adding an <h1> element in the HTML document
  document := js.Global().Get("document")
  p := document.Call("createElement", "h1")
  p.Set("innerHTML", "Hello from Golang!")
  document.Get("body").Call("appendChild", p)

  //2. Exposing go functions/values in javascript variables.
  js.Global().Set("goVar", "I am a variable set from Go")
  js.Global().Set("sayHello", js.FuncOf(sayHello))

  //3. This channel will prevent the go program to exit
  <-c
}

func sayHello(this js.Value, inputs []js.Value) interface{} {
  firstArg := inputs[0].String()
  return "Hi " + firstArg + " from Go!"
}
The above code shows how we can interact fully with the browser API using Go’s experimental package syscall/js. Let’s discuss the above example.
The js.Global() method is used to get the Javascript global object that is window or global. We can then access global objects or variables like document, window, and other javascript APIs. If we want to get any property from a javascript element we will use obj.Get("property") and to set a property obj.Set("property", jsDataType). We can also call a javascript function with Call method and pass args as obj.Call("functionName", arg1,arg1). In the above example, we have accessed the document object, created an h1 tag, and appended it into HTML body using DOM API.
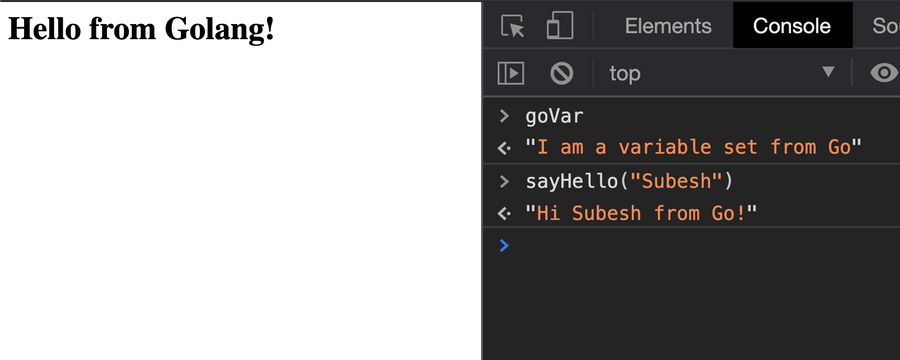
In the second portion of the code, we have exposed Go function and set a variable that can be accessed by javascript. The goVar is a string type variable and sayHello is a function type. We can open up our console and interact with the exposed variables. The function definition for sayHello can be seen in the last section of the code that takes an argument and returns a string.
At the end of the main block, we are waiting for a channel that will never receive a message. This is done to keep the Go code running so that we can access the exposed function. In other languages like C++ and Rust Wasm treats them like a library i.e we can directly import them and start using exposed functions. However in Go, the importing is treated as an application i.e you can access the program when it has started and run, and then the interaction is over when the program is exited. If we don’t add the channel at the end of the block then we won’t we able to call the function that has been defined in Go.
The above code produces the following output:
Go WebAssembly Example 2
Importing Image to Ascii library to the browser
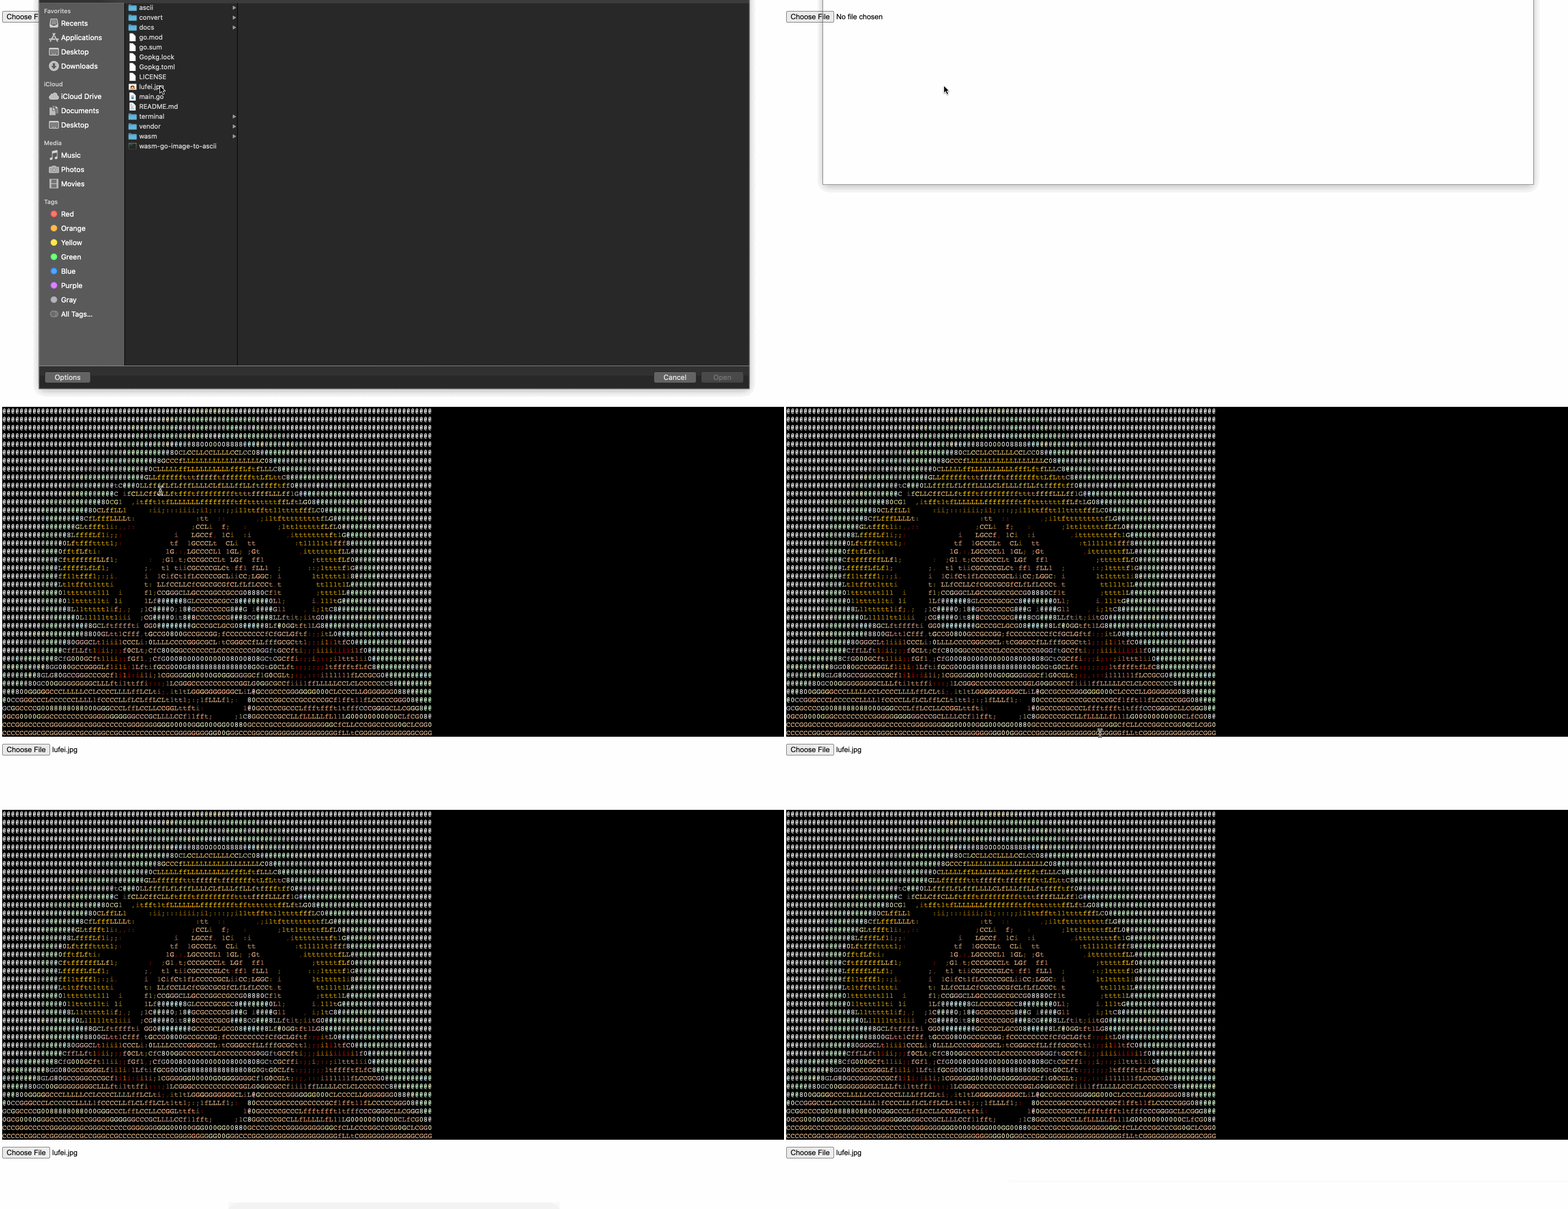
Now, that we know how to interact back and forth between Go and the browser, let’s build a real-world application. We will be importing an existing library, image2Ascii that converts an image to ASCII characters. It is a Go CLI application that takes the path of an image and converts it to Ascii characters. Since we can’t access the file system in the browser directly, I have altered some of the code in the library to take bytes of the image instead of the file path. The source to the repo with changes: wasm-go-image-to-ascii. We only need to worry about the exposed API from the library rather than how the algorithm works for now. It exposes the following:
func ImageFile2ASCIIString(imgByte []byte, option *Options) string
type Options struct {
  Colored         bool    `json:"colored"`
  FixedWidth      int     `json:"fixedWidth"`
  FixedHeight     int     `json:"fixedHeight"`
  Reversed        bool    `json:"reversed"`
}
Let’s divide the whole process into the following tasks:
- Create an event listener for file input that passes the selected image to our Go function.
- Write the Go function to convert image to ASCII and expose it to the browser.
- Build and Integrate into the browser.
Create an event listener for file input
We will move ahead assuming a function named convert(image, options) will be created by Go.
document.querySelector('#file').addEventListener(
  'change',
  function() {
    const reader = new FileReader()
    reader.onload = function() {
      // Converting the image to Unit8Array
      const arrayBuffer = this.result,
        array = new Uint8Array(arrayBuffer)
      // Call wasm exported function
      const txt = convert(
        array,
        JSON.stringify({
          fixedWidth: 100,
          colored: true,
          fixedHeight: 40,
        })
      )
      // To convert Ansi characters to html
      const ansi_up = new AnsiUp()
      const html = ansi_up.ansi_to_html(txt)
      // Showing the ascii image in the browser
      const cdiv = document.getElementById('console')
      cdiv.innerHTML = html
    }
    reader.readAsArrayBuffer(this.files[0])
  },
  false
)
We have added a change listener to input with id file. Once the image is selected by the user we will send the image by converting it to Unit8Array to the convert function.
Go function to convert image to ASCII
package main

import (
  "encoding/json"
  _ "image/jpeg"
  _ "image/png"
  "syscall/js"

  "github.com/subeshb1/wasm-go-image-to-ascii/convert"
)

func converter(this js.Value, inputs []js.Value) interface{} {
  imageArr := inputs[0]
  options := inputs[1].String()
  inBuf := make([]uint8, imageArr.Get("byteLength").Int())
  js.CopyBytesToGo(inBuf, imageArr)
  convertOptions := convert.Options{}
  err := json.Unmarshal([]byte(options), &convertOptions)
  if err != nil {
    convertOptions = convert.DefaultOptions
  }

  converter := convert.NewImageConverter()
  return converter.ImageFile2ASCIIString(inBuf, &convertOptions)
}

func main() {
  c := make(chan bool)
  js.Global().Set("convert", js.FuncOf(converter))
  <-c
}
We expose a convert function that takes image bytes and options. We use js.CopyBytesToGo to convert javascript Uint8Array to Go []byte. After the image is converted the function returns a string of Ascii/Ansi characters.
Build and Integrate into the browser
Finally, we can build the code to wasm and import it to the browser.
<html>
  <head>
    <meta charset="utf-8" />
    <script src="https://cdnjs.cloudflare.com/ajax/libs/BrowserFS/2.0.0/browserfs.js"></script>
    <script src="https://cdn.jsdelivr.net/gh/drudru/ansi_up/ansi_up.js"></script>
    <script src="wasm_exec.js"></script>
  </head>
  <body>
    <!-- ASCII Image container  -->
    <pre
      id="console"
      style="background: black; color: white; overflow: scroll;"
    ></pre>
    <!-- Input to select file -->
    <input type="file" name="file" id="file" />
    <script>
      // Integrating WebAssembly
      const go = new Go()
      WebAssembly.instantiateStreaming(
        fetch('main.wasm'),
        go.importObject
      ).then(result => {
        go.run(result.instance)
      })
      // Adding image change listener
      document.querySelector('#file').addEventListener(
        'change',
        function() {
          const reader = new FileReader()
          reader.onload = function() {
            // Converting the image to Unit8Array
            const arrayBuffer = this.result,
              array = new Uint8Array(arrayBuffer)
            // Call wasm exported function
            const txt = convert(
              array,
              JSON.stringify({
                fixedWidth: 100,
                colored: true,
                fixedHeight: 40,
              })
            )
            // To convert Ansi characters to html
            const ansi_up = new AnsiUp()
            const html = ansi_up.ansi_to_html(txt)
            // Showing the ascii image in the browser
            const cdiv = document.getElementById('console')
            cdiv.innerHTML = html
          }
          reader.readAsArrayBuffer(this.files[0])
        },
        false
      )
    </script>
  </body>
</html>
Here is the link to the repository: https://github.com/subeshb1/wasm-go-image-to-ascii
Conclusion
We looked at the basics of Wasm and how to use it to import Go code into the browser. We also looked at how we can import an existing library and create a real-world application to convert images to ASCII characters. Do share your thoughts and feedback in the comment section, and share your project in WebAssembly as well. Although Wasm is in an early stage, we can see how useful it can be to remove language dependency on the browser and improve performance by running at near-native speed.
- Basic Example covered in the blog: https://github.com/subeshb1/Webassembly/tree/master/go
- Wasm image to ASCII: https://github.com/subeshb1/wasm-go-image-to-ascii
- Demo: https://subeshbhandari.com/app/wasm/image-to-ascii
More Resources on WebAssembly:
- Awesome Wasm: https://github.com/mbasso/awesome-wasm
- WebAssembly from MDN: https://developer.mozilla.org/en-US/docs/WebAssembly